iCIS Intra Wiki
categories: Info - Support - Software - Hardware | AllPages - uncategorized
SetCalendarPolicyInOutlook: Difference between revisions
Jump to navigation
Jump to search
No edit summary |
No edit summary |
||
| Line 1: | Line 1: | ||
The preferred sharing settings according to iCIS policy is: | |||
* "Agendabeheer iCIS All management assistants" : "Editor" permission | |||
* "Agendabeheer iCIS Institute" : "Reviewer" permission | |||
# Open the outlook desktop application, open the calendar view, and right click your calendar to open the context menu. Within the context menu select "Sharing Permissions":<br> [[File:4_open_sharing_permissions.png|800px]] | # Open the outlook desktop application, open the calendar view, and right click your calendar to open the context menu. Within the context menu select "Sharing Permissions":<br> [[File:4_open_sharing_permissions.png|800px]] | ||
| Line 12: | Line 17: | ||
# Click the "Ok" button | # Click the "Ok" button | ||
Verify that the permissions are: | |||
* "Agendabeheer iCIS All management assistants" : "Editor" permission | |||
* "Agendabeheer iCIS Institute" : "Reviewer" permission | |||
'''Done''' | '''Done''' | ||
Revision as of 12:44, 12 December 2019
The preferred sharing settings according to iCIS policy is:
- "Agendabeheer iCIS All management assistants" : "Editor" permission
- "Agendabeheer iCIS Institute" : "Reviewer" permission
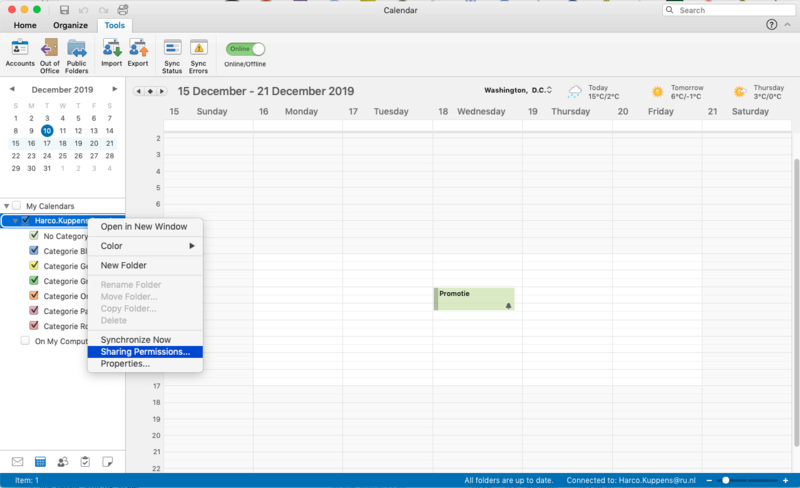
- Open the outlook desktop application, open the calendar view, and right click your calendar to open the context menu. Within the context menu select "Sharing Permissions":
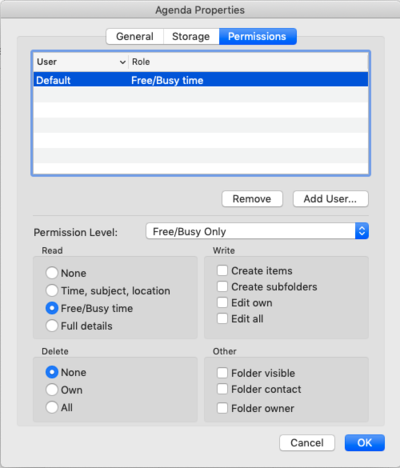
- Then the following window is shown which shows the default policy of Free/Busy time:
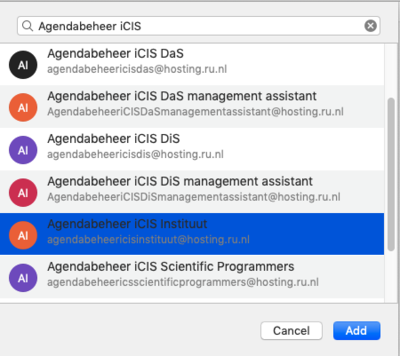
- Press the "Add User..." button, then in the popup windows type "Agendabeheer iCIS" and select the "Agendabeheer iCIS Instituut" entry. The window should look like:
- Press the "Add" button, and then you return to the "Agenda Properties" window which now has an extra entry:
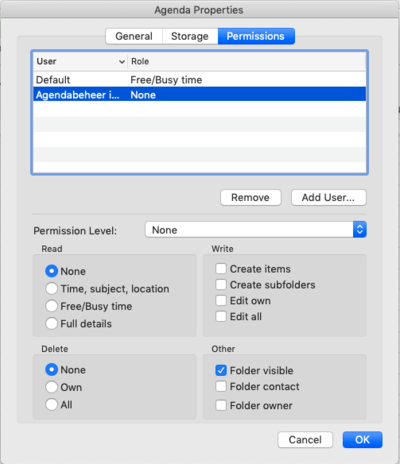
- Unfortunate the name of the entry is not fully shown, but if you hoover over it with your mouse pointer then the full name will be shown in a tooltip:

- Then change the value in "Permission Level" selection box to "Reviewer":
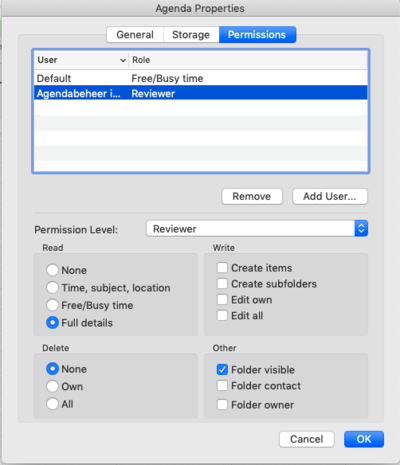
- Again press the "Add User..." button, then in the popup windows type "Agendabeheer iCIS" and select the "Agendabeheer iCIS All Management Assistants" entry. The window should look like:
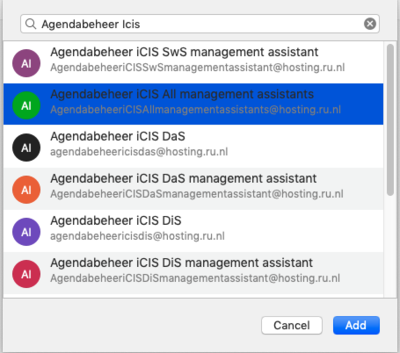
- Press the "Add" button, and then you return to the "Agenda Properties" window which now has an extra entry:
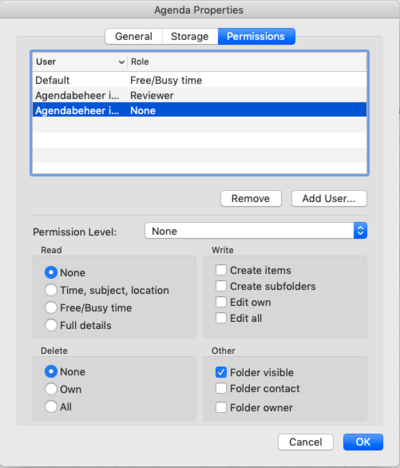
- Then change the value in "Permission Level" selection box to "Editor":
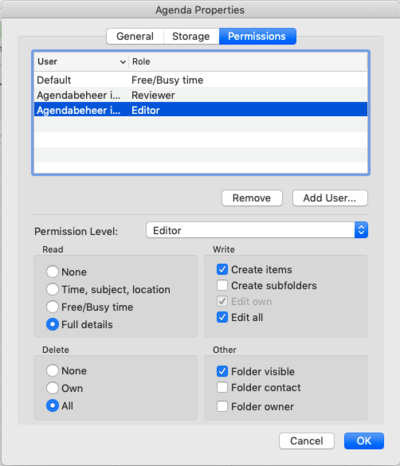
- Again the name of the entry is not fully shown, but if you hoover over it with your mouse pointer then the full name will be shown in a tooltip:
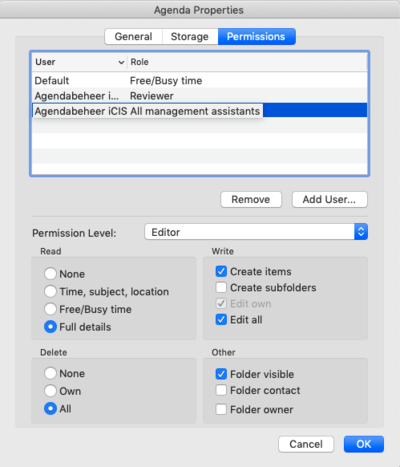
- Click the "Ok" button
Verify that the permissions are:
- "Agendabeheer iCIS All management assistants" : "Editor" permission
- "Agendabeheer iCIS Institute" : "Reviewer" permission
Done